
Table of Contents
Use PowerShell for Microsoft Graph
In this tutorial I am going to explain how you can make a Microsoft Graph API report yourself with PowerShell. The steps include creating an AzureAD App registration in the Azure Portal.
Use the table of contents to skip parts.
Where do we start?
We will use the Office 365 Group Usages reports as an example.
- We start with browsing to the Microsoft Graph REST API.
- Here you see a menu on the left.
Under the references are all kinds of options.
Reports is one of them.
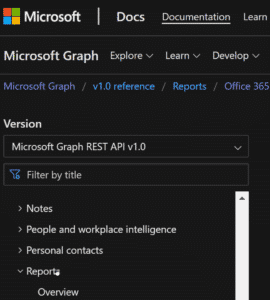
- Open the menu and look at the submenu. The following link is in the submenu:
Office 365 Group Activity
- And this contains another submenu with different report options.
- When you click on Office 365 Groups activity reports, you can see what each link contains in terms of data.
- The first in the list is the report we need:
Get details about Office 365 Groups activity by group.

Great, so we now know which report we need for our data.
Here you’ll see more information than just an URL to use for the report. I explain the page further in the tutorial.
Register an AzureAD app registration
To be able to retrieve data in Microsoft Graph, we need an AzureAD app registration. In the steps below I explain how to create this for Microsoft Graph.
- Go to the Azure portal.
- Search for Azure Active Directory and open Azure Active Directory
- Go to App registrations
- click on + New registration and create a new app registration.
- Enter a Name.
Make sure that you can identify with the name for which the app registration is used.
For example, does the request come from a ticketing system? Then use the ticket number in the name.
This way you can also check whether the permissions are still correct for which the app registration is used. So, for example: XXXXXX_getOffice365GroupsActivityDetail. - Keep the Supported account types as is; Accounts in this organizational directory only TENANTNAME – Single tenant
- Register the application.
Microsoft Graph API App registrations need permissions in AzureAD
In the Permissions header on the Microsoft Graph page you’ll see the permissions needed from least to most privileged. This means that the first permission you’ll see is sufficient when we’ll only use it for this API report.

- Go to API permissions and click on + Add a permission.
- Select Microsoft Graph and select Application permissions.
- Mine example needs permission Reports.Read.All, so I’ll search for that.
- Check the permission and click Add permissions.

- We will need to Grant admin consent. Click on Grant admin consent.

We need the application ID and secret, redirectUri or certificate to make a connection to Microsoft Graph API with PowerShell
The ApplicationID is easy, You’ll see that in the overview:

I will use a Certificate.
Go to Certificates & secrets.
A certificate is safer than a password because both sides need the same certificate to be able to logon. For testing purposes you can upload a self signed certificate created with this PowerShell script: Generate-LogonCertificate.ps1.
You can upload the Certificate and use this when logging on to Microsoft Graph.
More about this later including a blog post about the logon certificate script.
I will use a client secret.
Go to Certificates & secrets.
Please keep in mind a ClientSecret can always be brute forced, or stolen even, no matter what.
Go to Client secrets and click + New client secret.
The description and expiry date is up to you. I usually keep them on 1 year for safety.
Save the secret somewhere safely. It will be encrypted and unable to see after you leave the page.
We’re now ready to start with PowerShell.
I will use credentials.
When you will use UserCredentials you will need to add Delegated Permissions instead. Go back to the paragraph permissions if you need help regarding this.
Basic authentication is not secure, but if you want to use it anyway you need to use Get-Credential in your script.
For Multi-Factor Authentication we will need to add a redirectUri. You can add a msal Uri.
- Go to Authentication
- click Add a platform
- Select Mobile and desktop applications
- Select the Uri that starts with msal, in the middle your AppID and ends with ://auth
msalXXXXXX-XXXX-XXXX-XXXX-XXXXXXXXXXXX://auth - Add a Custom redirect Uri like:
https://localhost - After you save you can remove the localhost url.
You will need to use the msal uri to log on Optimized.Mga.
Now, let’s finally use PowerShell for Microsoft Graph API
I have converted the functions into a module.
You can download the module from the PowerShell Gallery.
For more information about the module, it is best to go to Github.
If you want to install it immediately, you can use the following command.
Install-Module -Name Optimized.Mga