

Table of Contents
Running Android in VirtualBox.
In this blog post I explain how you can install Android in VirtualBox. If you have Windows 10 Pro or higher, you can also use a built-in Windows Feature Hyper-v. I also wrote a blog post for Android in Hyper-V.
If you do not have Windows 10 Pro, you can use VirtualBox as a virtualization tool. A Virtualization tool such as VirtualBox or Hyper-V lets you run different OS or multiple virtual machines without having to install it directly on your PC.
In this post we will look at Android in VirtualBox. There are many Android Emulators on the internet such as Bluestacks, but these applications are often slow and require a lot of resources from your computer.
If you install Android in VirtualBox you have an empty installation without extras. This allows you to test applications, or use Android only applications on your Windows Device.
Before we start with Android in Virtualbox – prerequisite
- First, we need … VirtualBox! Download Virtualbox here.
- We need the Android ISO (Image) to install Android.
Click here for an Android ISO.
Keep in mind that your Host OS has at least 5GB hard drive and 512Mb Memory
Let’s install VirtualBox.
For if you don’t know the steps how to install VirtualBox I’ve made a seperate blog you can find here.
Installing a Virtual Machine for Android specifically.
Start VirtualBox.
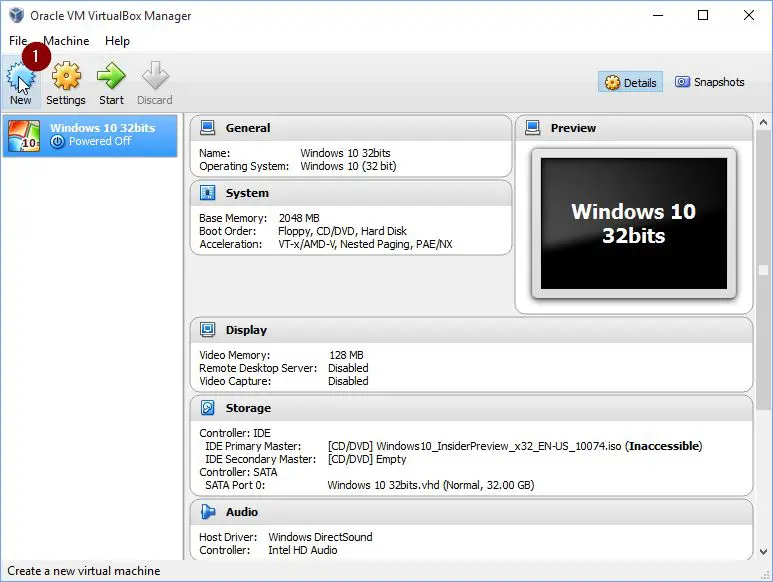
After you’ve started VirtualBox you’ll see the main screen where you’ll see your Virtual Machines.
Click on New.
The Create Virtual Machine will pop-up
Choose a Name what you want. I go for Android.
Type requires you to select Linux.
In short: Android is based on Linux, for more about this you better go to Wikipedia.
Always choose the highest version with Linux version.

You need a minimum of 512MB for Android. The higher the Memory, the better your Android runs. Keep in mind how much the Host has in total and base your Memory on this.

Select Create a virtual hard disk now and click Create.
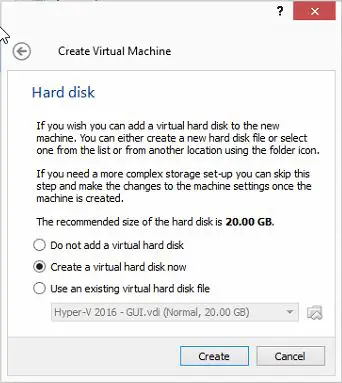
Do you ever think that you will switch to a Windows 10 Pro version, then I would go for VHD. Otherwise I would keep VDI selected.
Click Create.

Go for Dynamically allocated.
Click Next.

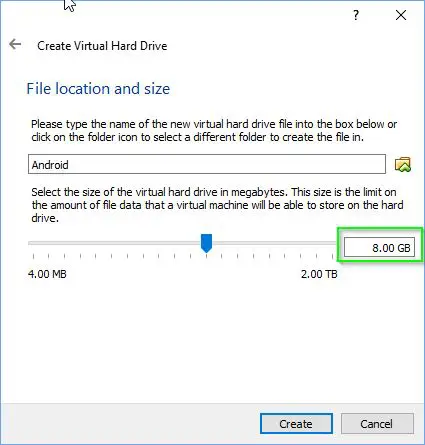
Choose between 2 and 8GB depending on your hosts HDD.
Click Create.
Select your Android Virtual Machine and click on Settings.

Select Storage.
Go to Controller: IDE and click on Empty.
Select your Android ISO.
It’s usually in your Downloads folder.

We’ve successfully created a Virtual Machine for Android.
Let’s finally install Android in VirtualBox.
Select your Android virtual machine in the start screen and click on Start.
You’ll need to start using your arrow keys now.
Select ‘Installation – Install Android-x86 to hard disk‘ with the arrow keys.

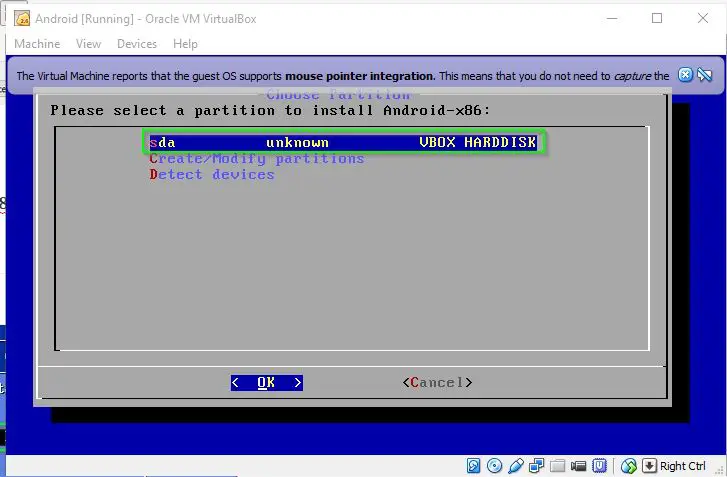
You should see a HDD you’ve created in the previous paragraph.
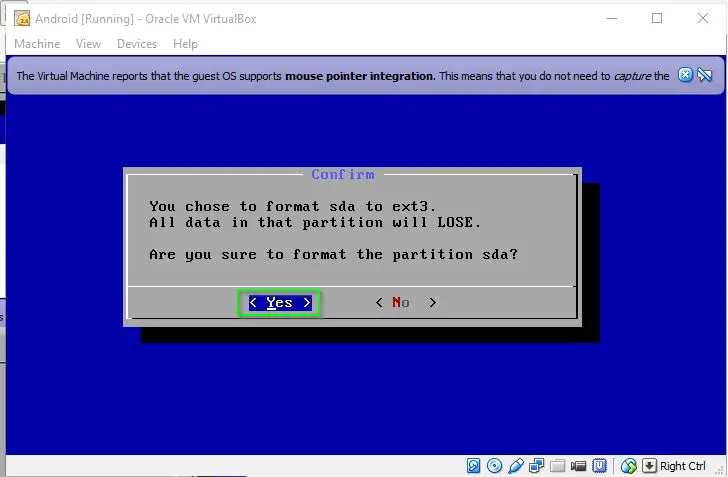
Select sda.
Select ext3 as file system.

Select Yes to continue

Select Yes to continue.
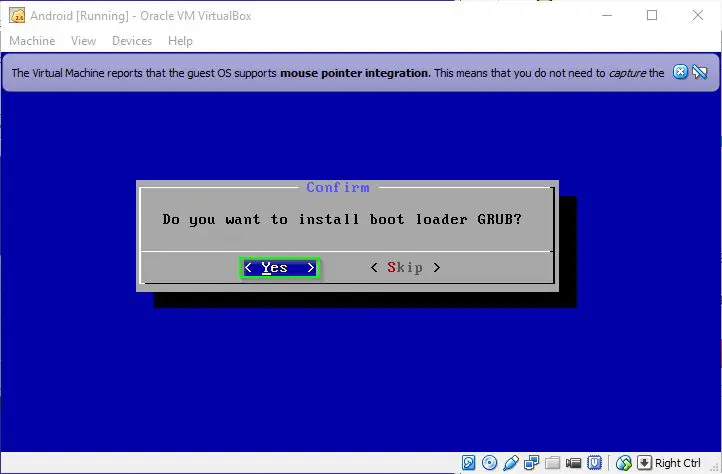
Select Yes to continue.

..And select Yes again.
Select Yes to continue.

We’ve created the image with at least 512MB in the previous step.
Select Yes again.

I’ve missed a screenshot, but click Select.
Select Run Android-86x.

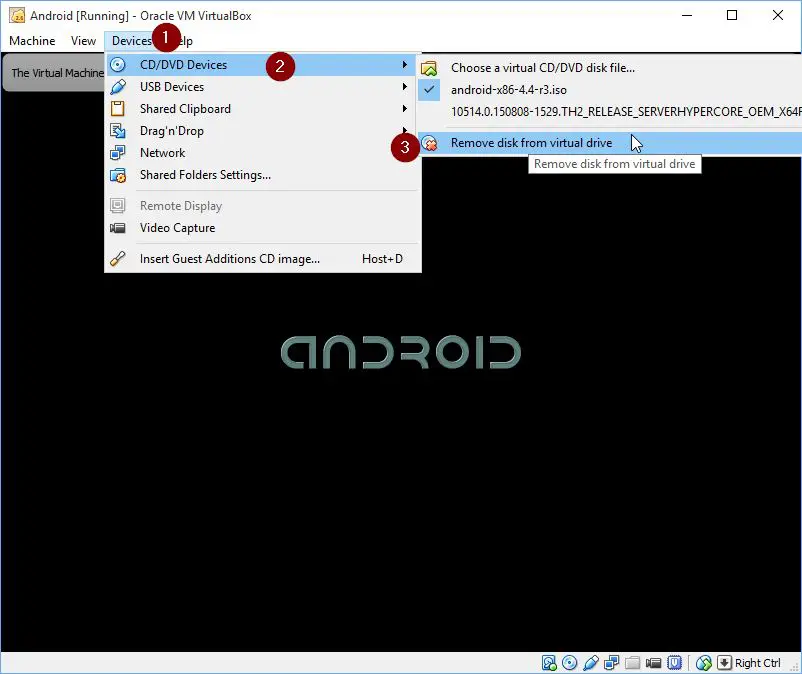
Before we start the virtual machine, we’ll have to remove the Android ISO from the Virtual Machine. Otherwise it will proceed with the installation again.
Go to Devices.
Open CD/DVD Devices.
And click Remove disk from virtual drive.
We’ve successfully installed a Virtual Machine with Android.